The canvas of General Hospital is set to explode with high-stakes tension on Thursday, July 2. Danger is radiating across multiple locations, leaving the residents of Port Charles caught in a web of life-or-death stalemates, desperate tactical retreats, and ruthless extortion. From the shadows of Wyndemere to the inner sanctum of the Jerome Art Gallery, survival is the only thing that matters as several major storylines collide in spectacular fashion.
With weapons drawn and captives pushing for their freedom, viewers are in for a breathless hour where one wrong move could spell ultimate disaster.


Hostage Terror and Blackmail at the Jerome Art Gallery
The tension reaches a boiling point at the Jerome Art Gallery, where Jenz Sidwell is currently staging a terrifying showdown. Sidwell is holding a gun at point-blank range directly to the head of Acting District Attorney Justine Turner. Using the terrifying position of his hostage as ultimate leverage, Sidwell blatantly blackmails Sonny Corinthos to secure his own freedom.
The menacing villain makes his intentions chillingly clear: he wants to get away, and he firmly believes that Sonny is exactly the man who possesses the power and resources to make that happen.
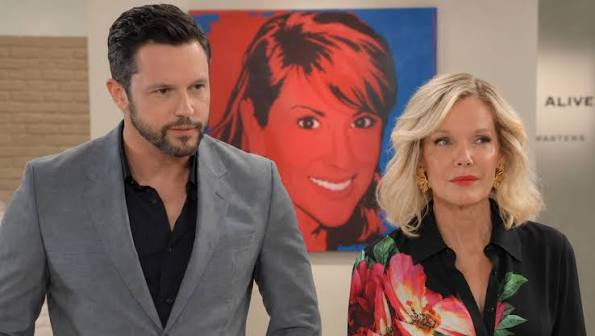
Meanwhile, Ava Jerome and Ethan Lovett remain hidden away in the gallery’s storage room, desperately trying to assess the crisis unfolding just beyond the door. Peeking out from their hiding spot, they can hear the terrifying interactions taking place in the main room. Ava is in a state of absolute urgency, insisting to Ethan that they have to do something now to intervene.
However, their tactical options are severely limited. Ethan is dealing with a painful gunshot wound to his gluteus maximus, and a worried Ava has been actively fussing over his desperate need to get to a hospital as soon as possible. Despite the physical limitations of his injury, neither Ethan nor Ava wants to leave Sonny to fend for himself against an armed madman, especially since Sidwell appears to be the only person in the room with a weapon. As they try to formulate a last-minute rescue plan, Ethan’s primary motivation remains fiercely locked on protecting Ava from harm.
Liesl and Josslyn’s High-Voltage Second Breakout Attempt
Over at the castle, the captivity of Liesl Obrecht and Josslyn Jacks takes an electrifying turn. After encountering a heavily armed goon at the door during their first attempt to break the lock, the resilient duo refuses to stay compliant. Instead, Liesl and Josslyn are bravely gearing up to give escaping a second try.
This time around, Liesl is taking a highly technical approach to their liberation. Armed with two different colored wires, she prepares to spark them together to manipulate the building’s electrical system. Liesl asks a visibly anxious Josslyn if she is ready for what comes next. Though absolute terror is written all over her face, a defiant Josslyn firmly agrees that she is.
The show appears to be setting up a scenario where the two women are attempting to entirely disable the lighting for the whole castle to mask their getaway in total darkness. The burning question remains: will they actually manage to pull it off this time? Fortunately for fans of the duo, General Hospital spoilers confidently predict that their second daring attempt will indeed be a success.
Revelations in France and a Heartbroken James West
Far away from the immediate violence in Port Charles, the international espionage front is yielding critical answers. In France, Anna Devane expresses deep gratitude to Felicia Scorpio. Felicia chose to personally test out a lingering theory, and a relieved Anna confirms that her trusted friend was entirely right about everything.
Felicia is poised to thoroughly update Anna on the shocking intelligence she received from Cody Bell. The biggest piece of news centers on the elusive Cassius Faison, who appears to have successfully executed an escape.
This development has left a trail of emotional wreckage in its wake, particularly for young James West. The little boy is reportedly deeply upset that his “dad” is leaving him yet again. This heartbreak comes on the heels of the imposter telling the child that he had done something wrong. Yet, no matter what dark truths James may have overheard, the narrative emphasizes that the man living as “Nathan West” felt a genuine, profound love for the little boy. With these vital updates out in the open, Felicia and Anna should be shifting their focus toward getting Anna back home where she belongs.
Ross Cullum’s Flight and a Heroic Intervention
Back on the home front, Ross Cullum is making a desperate move of his own. Cullum is outside surrounded by a heavily armed faction of his own goons, aggressively attempting to escape with the highly coveted cold fusion prototype. His ultimate goal is to bring the dangerous weapon online at the specific testing area he openly detailed earlier.
However, Cullum’s plans hit an unexpected snag when he detects an unknown element in play, prompting him to sharply demand to know if the anomaly has been successfully contained.
This high-intensity zone appears to be the exact location where the mysterious character Z, played by guest star John Oliver, is scheduled to arrive via helicopter. According to official appearance schedules, this highly anticipated arrival will take place between July 2 and July 6.
While Cullum believes he has the upper hand, upcoming spoilers tease that his escape will not go according to plan. In a shocking twist, Josslyn Jacks will somehow find herself in the position to directly prevent Cullum from fleeing with the lethal prototype. Her brave actions will completely alter the trajectory of the crisis, earning her the highest praise from the incoming Z, who will explicitly hail Josslyn as a true hero.
Carly Corin-thos Fights a Brutal Fight for Survival
Finally, the peril becomes painfully physical for Carly. Trapped in the depths of Wyndemere, Carly is locked in a brutal, life-or-death struggle against Agent Harker. Following strict orders from Cullum to eliminate her permanently, Harker is closing in for the kill.
Refusing to go down without a fight, a fierce Carly takes a violent swipe at her attacker using a nearby fire poker. Unfortunately, the weapon may not be enough to completely halt the assassin’s advance. In a horrifying moment of vulnerability, Carly cries out loudly as Harker manages to aggressively grab her by the leg just as she is frantically trying to crawl away across the floor.
With her life hanging by a thread, viewers are wondering who will arrive in the nick of time to save her from Harker’s clutches. Is it possible that young Danny Morgan and Charlotte Cassadine will suddenly stumble upon the violence and come to her rescue? Fans are speculating the brave teens might just clobber the rogue agent the exact same way he previously took out the other goon. One thing is absolutely certain: something has got to give, and it needs to happen quickly!
Thursday’s episode is a masterclass in pacing, splitting the danger between the physical threat to Carly’s life and the psychological chess match Sonny is playing at the gallery. Watching Josslyn step up from a terrified captive to a full-blown hero who stops Cullum’s prototype plot is the kind of character evolution soap fans live for. Keep your eyes on John Oliver’s entrance—Z’s arrival is bound to change the power dynamics of this entire storyline.
Who do you think will emerge victorious as the dust settles across Port Charles? Will Ava and Ethan’s gallery rescue backfire, or will Carly find the strength to overcome Agent Harker on her own? Let us know your thoughts and predictions in the comments below!